
|
One Pot Dyeing
|

|
|
There are several basic methods for dyeing roving or yarn. With this
method you can use one pot to add two or more colours at once. By making
slight changes to each step, you can achieve quite a few different effects.
In this example, I'll to use wool roving to illustrate two variations to this one pot method. |
|
Put fiber in the pot
|
|
|
Add water and heat
|
|
|
Prepare the dye
|
|
|
Begin adding the dye
|
|
|
Adding another dye colour
|
|
|
Add the third colour
|
|
|
Set the dye
|
|
|
Rinse and dry the fiber
|
|
|
The final results
|
|
|
Roving to yarn
|
|
|
More examples
|
|
Step 1: Put fiber in the pot
|
|
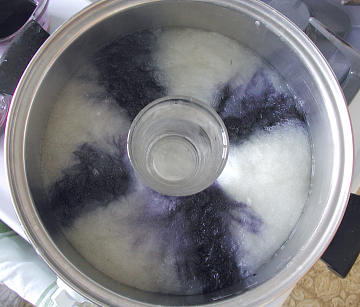
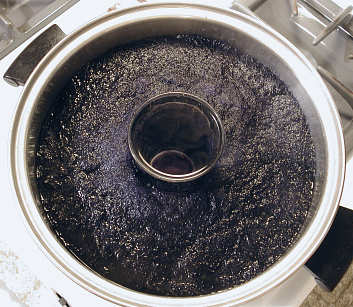
Start by laying your roving or yarn in your dye pot.
How you lay the fiber in the pot will affect how the dyed yarn or roving will look, so try a few different ways and see what you like. I generally roll up my roving into a loose spiral (if you make it too tight, the dye won't penetrate), or lay my 1 yard skeins (i.e. skeins wrapped on a one yard frame or kniddy noddy) on top of one another to make a big yarn donut. |
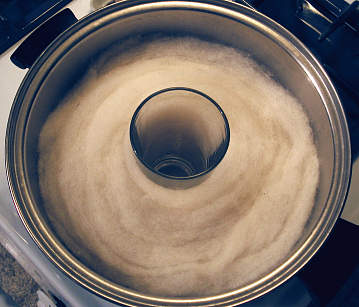
Put your wool or roving into the pot
|
|
Sometimes, as in this example, I put a heat resistant drinking glass
in the middle of the donut to help keep the colors distinct.
|
|
Step 2: Add water and heat
|
|
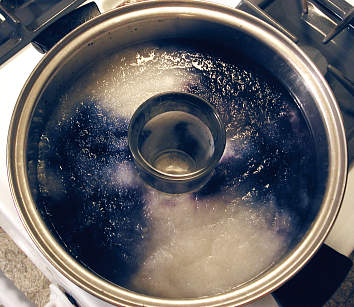
Now add plain water. Fill the pot leaving room to pour in dye.
The less water there is, the less the dye will migrate. I like
to use just enough water to cover the fiber. If you are using
a glass, then fill it up too, so it won't float.
|
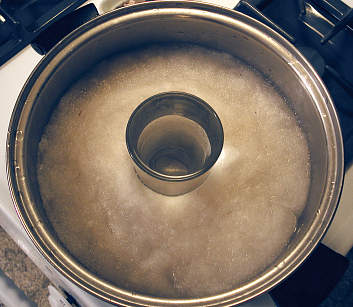
Add water
|
|
Heat the pot of fiber up to just below simmering -- boiling or
bubbling water will not only felt your fiber, but it will cause the
different colors to mix together too much.
|
|
Step 3: Prepare the dye
|
|
Prepare your dye. I add a bit of vinegar to the dye, but you can add
it to the dye pot if you like. 2 to 4 colors seem to work best. The
more you try to cram in the pot the more mixed up the results seem to
get. Similar colors might work well with more, and I suppose if you
had a really big pot, you could try more, but my pot just nicely
holds a 1 yard skein in the round.
If you can, it's best to get your dye up to the temperature that will set it, so when you pour it into the pot it can start dyeing right away. The longer it has to heat up, the more it will migrate over the whole pot. |
|
Step 4: Begin adding the dye
|
|
Now carefully pour the dye onto parts of fiber. When I use the spiral
roving or donut shape, I tend to pour the dye in pinwheel sections
(or sun rays out from the center), but again, find what works for
you. Different patterns will yield different results. If you pour
slowly, the colors will stay fairly separate; if you pour faster,
they will overlap and blend more which isn't necessarily a bad thing.
Of course you will always have some overlap where the colors meet.
I have even poured the colors leaving clear sections in between. This results in lighter hues in the clear parts (they don't stay white). |
|
Pot 1: I prepared three analogous (similar hues) dye colors:
Navy Blue, Royal Blue and Purple.
In this pot I will pour faster. The colours will blend more and the graduations between them will be much more subtle. In the photo at the right, I have added Navy dye to two areas of the roving. |
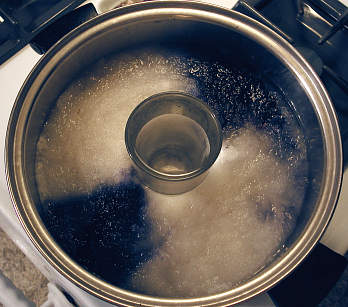
Pot 1: Begin adding dye
|
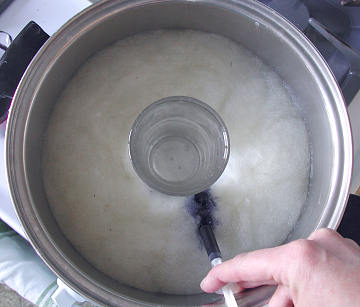
Pot 2: Begin adding dye
Pot 2: Add more dye
|
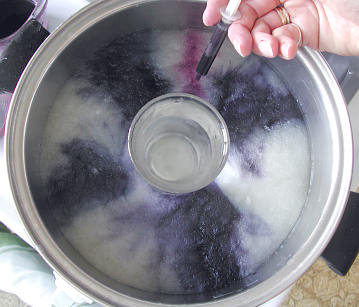
Pot 2: I prepared two colours: Navy Blue and Purple. In this pot
I am using a syringe to slowly apply the colours to very specific
areas of the roving. The result will be a much stronger difference
between each of the coloured areas.
In the photos at the left, I have carefully added Navy Blue dye to the roving. It is already beginning to spread, but this is okay. |
|
Step 5: Adding another dye colour
|
| Now it's time to move on to the next colour. |
|
Pot 1: I have added Royal Blue dye adjacent to the Navy dye.
|
Add the second colour
|
Begin adding the second colour
|
Pot 2: Again, I'm using the syringe to carefully apply the
Purple dye between the areas of Navy dye.
|
Add more of the second colour
|
Pot 2: I'm only adding two colours to this batch, so
I'll skip ahead to Step 7.
|
|
Step 6: Add the third colour
|
|
Pot 2 is done, but pot 1 still needs one more colour.
|
|
Pour the purple dye on the roving in the remaining spaces.
|

Add the last colour
|
|
If you are using more colours, continue adding them in
your chosen pattern. You can also just pour at random.
|
|
Note
|
|
If you are having trouble getting your fiber to stay underwater, just
set an old plate on top. It's even okay to let the plate float on
top. All it has to do is hold the fiber underwater -- anything that
sticks out won't be dyed (which is actually part of another dye
method).
|
|
Step 7: Set the dye
|
|
Now let the fiber cook in the dye to set the colour.
|
Set the dye
|
|
Once your pot has reached the right temperature (just below simmer)
start timing. In 20 - 30 minutes it should be done. If you are using
RIT dye (as in this example), you will be amazed at how mixed the
colors have become, but don't dispair. This is just the cellulose
dye. When you rinse out your fiber you will see that it has dyed the
areas separately.
|
|
Step 8: Rinse and dry the fiber
|
|
Rinse out the fiber. Start with very hot water and slowly
change to cool water with each rinse, or once the water stays
clear, let the pot sit to cool.
This is especially necessary if you are dyeing roving, as a sudden change in temperature (often called shocking) may cause your fiber to felt. Gently squeeze out the excess water. You can use the spin cycle of your washer to remove the water, too. You can spread out the roving to help it dry faster. For this example, I dried the roving in the round so you could see just how the dyed areas look. |
|
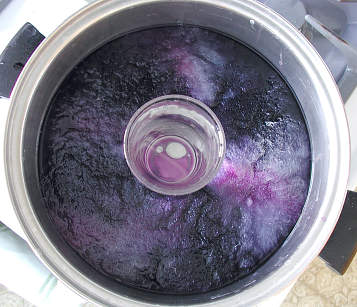
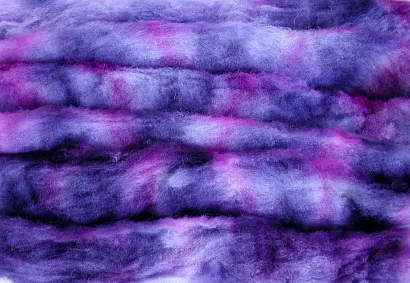
Because I poured the dye in faster, the
colours have merged and mixed somewhat.
|
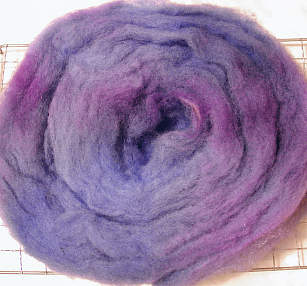
Here's the Pot 1 roving in the round.
|
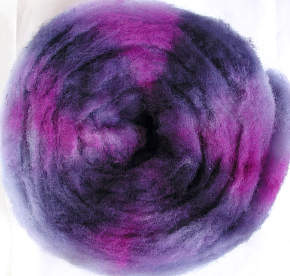
Here's the Pot 2 roving in the round.
|
Compare how the colours stayed fairly separate here with how
they blended more in Pot 1.
|
|
Step 9: The final results
|
|
If you spread out the roving, you will see varying bands of colour
along it's length.
|
|
Pot 1: The faster pouring resulted in subtle blending between
the three colours. It's hard to find where one ends and the next
colour starts.
|
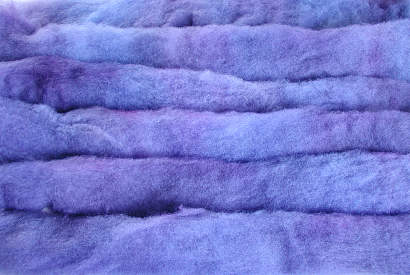
Pot 1 roving laid out in rows.
|
Pot 2 roving laid out in rows.
|
Pot 2: Adding the dye slower and more precisely resulted
in distinct bands of colour.
|
|
Step 10: Roving to yarn
|
|
Before you spin up your beautiful roving, think about how you want
the colour to lay on the finished yarn.
If you spin this thick roving into a thin yarn, then each colour area will be stretched out for yards and yards with very little change until the next group of yards and yards of yarn. If you then knit this yarn in the round for the body of a sweater, you would get wide horizontal stripes of colour going up the sweater. If you divide the roving up along its length into narrower strips and then spin each strip into a thick yarn, you will get colour changes occuring at nearly the same distance as in the dyed roving. If you then plyed the resulting singles, you would further integrate the colour shifts. Alternatively, you could grab random pieces of the roving as you spun, or even card sections together to blend the coloured fibers for a soft heathery look. |

The two rovings spun as singles
|
I chose to divide the roving along its length before spinning
these singles. Pot 1 roving is on the right, and Pot 2 roving is
on the left.
|
|
Here's how the singles look plied together. By using similar colours,
the result is a rich looking harmonious yarn.
Imagine if I had used Red, Yellow and Blue dye. |
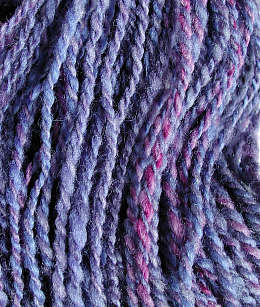
Pot 1 and Pot 2 plied together
|
|
More Examples
|
|
Here's what it might look like if you use this one pot method to dye
the finished yarn instead of the roving.
|
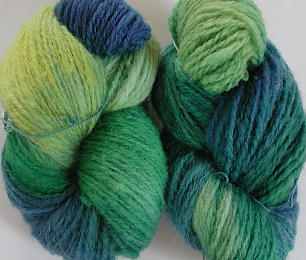
One Pot yarn
|
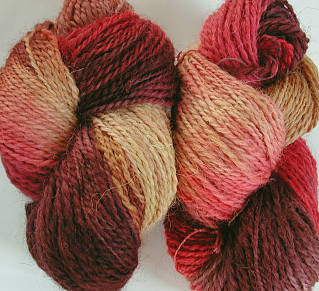
One Pot yarn
|
|
|

|
| This web page has been provided by Nordin Farms. You can find out more about us at www.nordinfarms.com |
|
|